resource定義無しのterraform入門
terraformの記述の仕方を調べるための個人的なメモ。resourceを定義しないterraformの設定が書けるようになってからterraformに関する苦手意識が消えた。
teraformはIaCのためのものというのはわかっているものの、terraform自体に不慣れな段階の間はただただ試しに書いてみては実行しまくりたい。そのようなときにいちいち実際のprovisioningが走るのを待つというのは耐えられない。
one file terraform
variablesを引数として、outputsを戻り値として、terraform moduleを関数として見るというようなことがドキュメントに書かれている。
同じ理屈で、CLIのエントリーポイントはmain関数。これがmain.tfに当たると解釈してあげれば良い。そんなわけでterraformでの記述の仕方を色々試すときに小さなmain.tfを気軽に作れる様になって置けると良い。以下の様なmain.tfを書いてみる。
main.tf
variable "aws_region" {
  default = "us-west-1a"
}

locals {
  person = {
    name = "foo"
    age  = 20
  }
}


output "json_result" {
  value    = jsonencode(local.person)
}

output "greeting" {
  value = "hello ${local.person.name} from ${var.aws_region}"
}
実行結果
$ terraform apply -auto-approve
Apply complete! Resources: 0 added, 0 changed, 0 destroyed.

Outputs:

greeting = "hello foo from us-west-1a"
json_result = "{\"age\":20,\"name\":\"foo\"}"
variableとして定義しておけば terraform apply -var <> で渡す引数を変えられる。xxxに変わった。
$ terraform apply -auto-approve -var='aws_region="xxx"'
Apply complete! Resources: 0 added, 0 changed, 0 destroyed.

Outputs:

greeting = "hello foo from xxx"
json_result = "{\"age\":20,\"name\":\"foo\"}"
こんな感じに手元で気軽に試せる環境を作っておいて試しまくるのが一番良い。
HCLの構文
terraformで使われる設定ファイルの記述言語はHCL (正確に言えばHCL2) 。これの仕様は以下にある。
- https://github.com/hashicorp/hcl/blob/main/hclsyntax/spec.md
- https://github.com/hashicorp/hcl/blob/main/spec.md
terraformのドキュメントにあるsyntaxの説明は大して役に立たない1。
利用できる組み込みの関数
利用できる組み込みの関数について知りたいときにドキュメントを見るべきなのかもしれないが一覧性が悪い。
雑に言うとgrepしたりなどが出来ない。直接コードを読んだ方が早い。
- https://github.com/hashicorp/terraform/blob/main/lang/functions.go
- https://github.com/zclconf/go-cty/tree/main/cty/function/stdlib
HCL2はgo-ctyがベースになっている(裏側で使われている)。実際どこかのタイミングでHCLを設定ファイルとして利用して読み込む例を作ってみたい2。
moduleの利用
moduleも同様にちょっとしたファイル群を作ってあげて試行錯誤していけば良い。以下の説明もresourceの利用が前提になっていてだるい。
はじめは以下の様なmain.tfを作ってみる。null_resourceとloca-execでコマンドの実行もできるのでそれくらいから始めると良い。
main.tf
locals {
  x = 10
  y = 20
  z = 30
}

resource "null_resource" "echo" {
  triggers = {
    x = local.x
    y = local.y
    z = local.z
  }

  provisioner "local-exec" {
    command = <<EOS
echo x=${local.x} y=${local.y} z=${local.z}
EOS
  }
}
実行結果
terraform apply -auto-approve
null_resource.echo: Creating...
null_resource.echo: Provisioning with 'local-exec'...
null_resource.echo (local-exec): Executing: ["/bin/sh" "-c" "echo x=10 y=20 z=30\n"]
null_resource.echo (local-exec): x=10 y=20 z=30
null_resource.echo: Creation complete after 0s [id=2240813459510242007]

Apply complete! Resources: 1 added, 0 changed, 0 destroyed.
terraform show
# null_resource.echo:
resource "null_resource" "echo" {
    id       = "2240813459510242007"
    triggers = {
        "x" = "10"
        "y" = "20"
        "z" = "30"
    }
}
これをmoduleに分ける。
$ tree
.
├── main.tf
└── modules
    └── xyz
        ├── main.tf
        └── variables.tf

2 directories, 3 files
main.tf
module "echo1" {
  source = "./modules/xyz"

  primary_configuration = {
    x = 10
    y = 20
    z = 30
  }
}

module "echo2" {
  source = "./modules/xyz"

  primary_configuration = {
    x = 10
    y = 20
    z = 30
  }
}
modules/xyz/variables.tf
variable "primary_configuration" {
  type = object({
    x = number
    y = number
    z = number
  })
}
modules/xyz/main.tf
resource "null_resource" "echo" {
  triggers = {
    x = var.primary_configuration.x
    y = var.primary_configuration.y
    z = var.primary_configuration.z
  }

  provisioner "local-exec" {
    command = <<EOS
echo x=${var.primary_configuration.x} y=${var.primary_configuration.y} z=${var.primary_configuration.z}
EOS
  }
}
実行結果
$ terraform apply -auto-approve
module.plain.null_resource.echo: Refreshing state... [id=5834646776835244708]
module.plain.null_resource.echo: Destroying... [id=5834646776835244708]
module.echo2.null_resource.echo: Creating...
module.echo1.null_resource.echo: Creating...
module.plain.null_resource.echo: Destruction complete after 0s
module.echo1.null_resource.echo: Provisioning with 'local-exec'...
module.echo2.null_resource.echo: Provisioning with 'local-exec'...
module.echo1.null_resource.echo (local-exec): Executing: ["/bin/sh" "-c" "echo x=10 y=20 z=30\n"]
module.echo2.null_resource.echo (local-exec): Executing: ["/bin/sh" "-c" "echo x=100 y=200 z=300\n"]
module.echo2.null_resource.echo (local-exec): x=100 y=200 z=300
module.echo1.null_resource.echo (local-exec): x=10 y=20 z=30
module.echo2.null_resource.echo: Creation complete after 0s [id=1269680042276636852]
module.echo1.null_resource.echo: Creation complete after 0s [id=8965362161603827784]

Apply complete! Resources: 2 added, 0 changed, 1 destroyed.
terraform show
# module.echo2.null_resource.echo:
resource "null_resource" "echo" {
    id       = "1269680042276636852"
    triggers = {
        "x" = "100"
        "y" = "200"
        "z" = "300"
    }
}


# module.echo1.null_resource.echo:
resource "null_resource" "echo" {
    id       = "8965362161603827784"
    triggers = {
        "x" = "10"
        "y" = "20"
        "z" = "30"
    }
}
gist
git diffのようにワード単位で色の付いたdiffが欲しい
ワード単位のdiffが欲しかったのでメモ。
ワード単位のdiff?
以下のようなファイルがあるときに
$ ls src
src/000person.json
src/001person.json
000person.json と 001person.json の差分をdiffで見る1。色付きでみたいときには /tmp/a.diff などに出力してエディタでみたりなどしていた2。
$ diff -u src/000person.json src/001person.json
--- src/000person.json  2020-01-08 06:16:00.000000000 +0900
+++ src/001person.json  2020-01-08 06:16:00.000000000 +0900
@@ -1,5 +1,5 @@
 {
-  "name": "foo",
-  "age": 20,
+  "name": "bar",
+  "age": 21,
   "type": "person"
 }
ところで、git diffはいい感じにワード単位で色付きで表示してくれる。
$ cp -r src/001person.json src/000person.json
$ git diff

(追記: どうやらデフォルトの表示ではなく、diff-highlightを設定していたようだった。詳細は追記部分参照)
このようなワード単位の表示を他の場所でも使いたい。その方法のメモ。
行単位の色付け + 単語単位のハイライト
検索していたところ以下の様なスタックオーバーフローが見つかった。
まさにこれが探していたものだった。
#!/bin/sh -eu

# Use diff-highlight to show word-level differences

diff -U3 --minimal "$@" |
  sed 's/^-/\x1b[1;31m-/;s/^+/\x1b[1;32m+/;s/^@/\x1b[1;34m@/;s/$/\x1b[0m/' |
  diff-highlight
そんなわけで .bashrc に以下のような記述が増えた。
# diff -u <> <> | cdiffhighlight
cdiffhighlight() {
  SED=$(which gsed || which sed)
  $SED 's/^- /\x1b[1;31m-/;s/^+ /\x1b[1;32m+/;s/^@/\x1b[1;36m@/;s/$/\x1b[0m/' | diff-highlight
}
こんな感じで使う。最初はcdiffという関数を作っていたが補完などが効かなくなるので不便だったので辞めた。
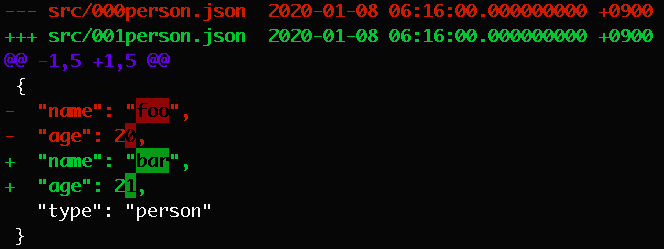
$ diff -u xxx yyy | cdiffhighlight
これが
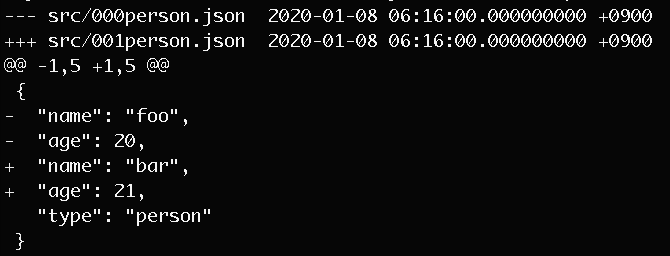
行単位で色が付き

ワード単位でハイライトされる。
sedとか使わずとも何らかのパッケージをインストールすれば便利だよという話はあるのかもしれないが、そもそもパッケージを新たに導入したくないのでこれくらいが無難なところだと思う3。
ここからは追記
追記: diff-highlight
diff-highlightはgitをインストールしているとついてくる。
$ port contents git | grep "diff-highlight$"
  /opt/local/bin/diff-highlight
  /opt/local/share/git/contrib/diff-highlight/diff-highlight
追記: git diffのデフォルトのワード単位のdiff
git diffのデフォルトのワード単位のdiffというとこちらの表示になる模様。
$ git diff --word-diff=color

~/.gitconfig に以下のような設定が含まれていた。以下の記事を参考にしていた模様
[pager]
    log = diff-highlight | less
    show = diff-highlight | less
    diff = diff-highlight | less
追記: 微妙にsedの内容を変えた
先頭の+++,---は色がついていなかった(スクリーンショットの時点では気づいていなかった)。変えた。 あと色が微妙に違った。
gist
https://gist.github.com/podhmo/fdc261640fd044648e73e01c5d62b9cb
参考
- https://udomomo.hatenablog.com/entry/2019/12/01/181404
- https://stackoverflow.com/questions/1721738/using-diff-or-anything-else-to-get-character-level-diff-between-text-files
- https://unix.stackexchange.com/questions/196565/how-to-color-diff-output
- https://future-architect.github.io/articles/20200610/